Go to
WordPress to see all WordPress installations hosted on the server.
WordPress Toolkit groups information about each installation in blocks we call
cards.
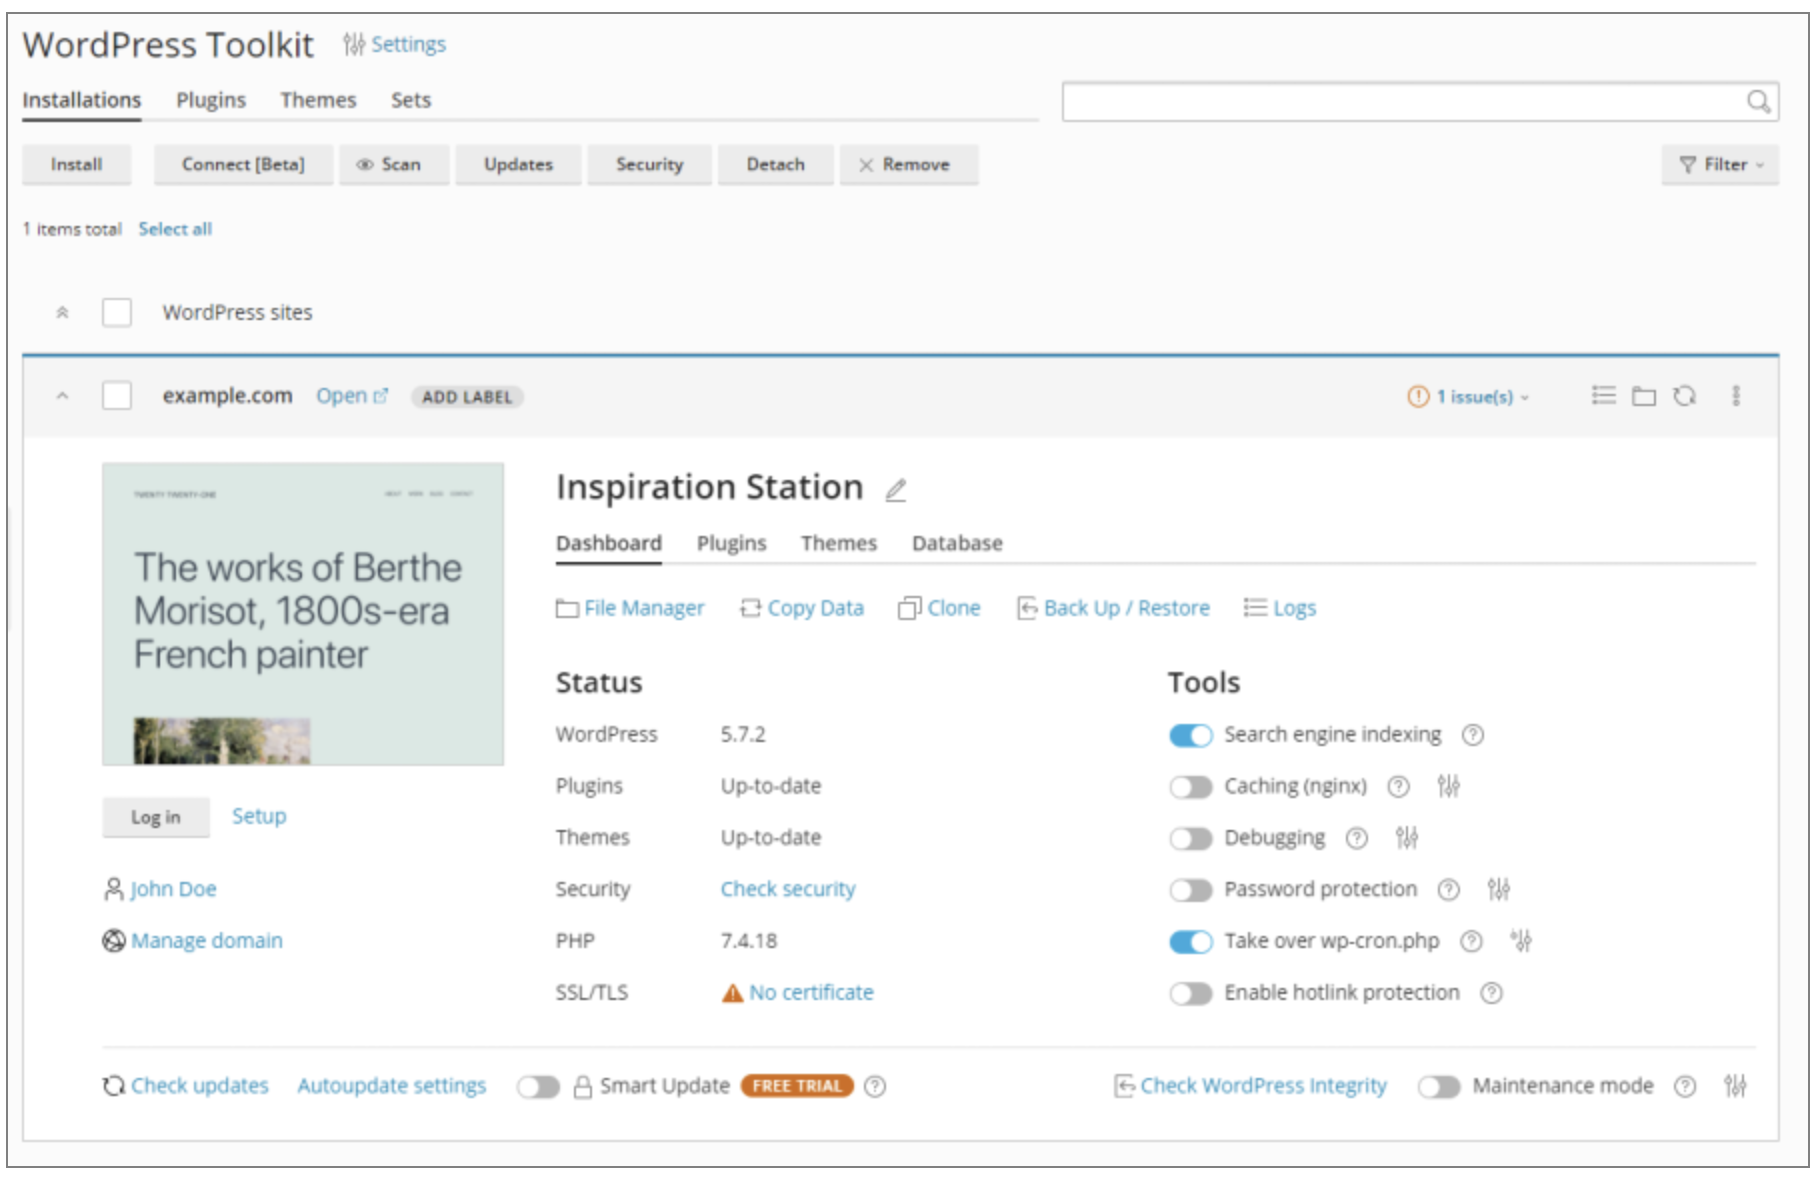
A card shows a screenshot of your website and features a number of controls that give you easy access to frequently used tools. The screenshot changes in real time to reflect the changes you make to your website. For example, if you turn on maintenance mode or change the WordPress theme, the screenshot of the website will change immediately.
When you move the mouse cursor over the screenshot of the website, you’ll see the following:
- Open Website button. To open the website in a new browser tab, click the button.
- Date and time the screenshot was updated last time. To update the screenshot right away, in the upper-right corner of the screenshot, click the
 icon.
icon.
Here you can also do the following:
- Change your website name. To do so, click the
 icon, give your website a name, and then click
  .
. - Log in to WordPress as an administrator. To do so, click Log in below the website screenshot.
- Change general WordPress settings. To do so, click “Setup” next to Log in.
- Go to the domain’s screen in Websites & Domains. To do so, click Manage domain below the website screenshot.
Status
WordPress websites are frequently targeted by hackers. Outdated WordPress core, plugins, and themes also pose a security risk.
In the “Status” section, you can do the following:
- See if the WordPress core as well as installed plugins and themes are up to date and update them if necessary.
- See if SSL/TLS support is enabled and, if not, enable it.
- See how safe is your website and enhance its security.
The controls in the “Tools” section give you easy access to the following settings and tools:
- “Search engine indexing” shows your website in search results of search engines.
- “Caching (nginx)” speeds up the website load time and reduces server load.
- “Debugging” helps you debug a website that is not ready for viewing and being tested or developed.
- “Password Protection” specifies the password you will use to log in to WordPress from Plesk.
- “Take over wp-cron.php” helps you set up a regular run of
wp-cron.php. - Enable hotlink protection helps you prevent other websites from displaying, linking or embedding your images. This is called hotlinking and it can quickly drain your bandwidth and make your website unavailable.
Above the “Status” and “Tools” sections, you find the following WordPress Toolkit features:
- “File Manager” to manage the website’s files in File Manager.
- “Copy Data” to copy the content of your website to another.
- “Clone” to make a full copy of your website.
- “Back Up / Restore” to create a backup of your website and restore it if necessary.
- “Logs” to view WordPress Toolkit logs of the installation you need to troubleshoot.
At the bottom of the website card, you can do the following:
- Install updates and configure autoupdates.
- Enable Smart Update, a premium feature, which helps you keep your production websites up to date without the risk of breaking them.
- Turn on “Maintenance mode”, which hides your website’s content from visitors.